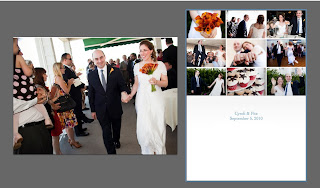
Happy December! A lot of my clients have been asking me how to create holiday cards with their images. I am always happy to offer design services for the time-pressed or not-so-tech-savvy clients out there, but thought I should offer this as well to all.
I've been using iPhoto services for cards for awhile now and love the ease of the software for my clients. The printing quality has been wonderful too, as well as the price! I used iPhoto to design thank you cards from pictures from my wedding!
One additional tip: To write on the iPhoto cards purchase some Ultra Fine Point Sharpie markers.
There are a lot of other really cool companies out there too for holiday cards. Below are a few of my favorites:
Moo- http://us.moo.com/products/holiday-cards.html
Tiny Prints - http://www.tinyprints.com/
Wedding Paper Divas - http://www.weddingpaperdivas.com/
Minted - http://www.minted.com/
Forever Fiances - http://www.foreverfiances.com/category_s/160.htm
Simple Card - http://www.simplecard.com/?cid=mp_com_homepage_simplecard
Paper Culture - http://www.paperculture.com/
Instructions for Designing and Ordering iPhoto Cards
1) Open up iPhoto and import the picture(s) you would like to use in your card from the folder on your DVD or desktop. You need 300 dpi images (high res jpgs) for printed cards. You can import photos by clicking on them and dragging them into the main iPhoto screen or go to the iPhoto "File" menu > select "Import to library…" and select your images.
2) Once your photos are imported, click on the “Photos” icon on the list on the left of your screen under the “Events” icon. Scroll and find your newly imported photos. If they are not all in the same section or “album” please click and drag them all into the same album/section.
3) Hold down the shift key and click on all of the photos in your album. You will need to select all of the photos you would like to use. All of the photos in your album will now be highlighted with a border.
4) Now click on the icon labeled "Card" in the center of the bottom of your screen, next to the "Calendar" button. A new menu showing different card designs will pop up.
5) Choose a design from the list on the left and click on a card design too. Once you have made your selection, click on the blue “Choose” button in the lower right corner.
6) Your card will automatically load with images! Voila! You can make additional design changes now by selecting the front or inside of your card and then clicking on the "Design" button at the bottom of the screen. Make changes to the color, theme or orientation with the additional buttons at the bottom of your screen too.
7) You can adjust the image size and the placement of the images by clicking on each image. A slider pops up so you can zoom in or out of each selected image. If you want to move images around, just click and drag them into another image box.
8) Type any text you would like in the text areas. To change the color, size and font, click on the "Edit" menu at the top of your screen > select "Font". A font menu will pop up. Make sure you highlight the text before you make changes to the text.
9) Once you are happy with the design of your card click on the “Buy Card” button in the lower right corner of your screen. Don't forget to double check spelling!
10) Order cards and make yourself a cup of hot chocolate!
Happy card-making!
